EmberShare Help
Background
EmberShare is a file-sharing app that lets you share media files between devices in a variety of ways, even when there's no local internet or Wi-Fi access, for example via Bluetooth, a web server run from your phone, or Wi-Fi Direct.
Getting around

Menu: opens a side drawer with Manage Tags, Settings, Share this app, and Contact Us.

List: your file library: search, filter, share, edit, or delete files.

Server: start and stop EmberShare's built-in web server.

Import: bring new files into EmberShare.
Below the drawer's own menu items, a running total shows how many files you've shared so far, with a small badge whose colour changes as that count passes certain milestones.
List screen
The List screen shows every file in your library and is where you share, edit, or delete them, one at a time or in a batch.
Searching and filtering

The search box at the top matches on filename. Beneath it are filter chips (Country, Language, Media, Extension, Type, and any custom tags you've added). Tap one to pick a value, or several to narrow the list further. Multiple filters combine together. Each category's value list also offers [None], to find files with no value at all (e.g. every file that's never had a Language set).
Tap the small x on an active filter chip to clear it.

Clear filters: clears every active filter at once.
Each file panel also shows its own tag pills. Tapping one applies it as a quick filter, the same as picking it from the filter row.
Editing and deleting a file

Edit: opens a sheet to rename the file and add or remove tags.

Delete: deletes the file (you'll be asked to confirm). Long-press starts a multi-file selection to delete in one go. Tap on the selection bar to pick up every file matching your current search/filters at once.
Sharing a file
Beneath the filename is a row of share icons:

Bluetooth: sends the file using your phone's Bluetooth sharing. The receiving device doesn't need EmberShare installed.

Wi-Fi Direct: a direct device-to-device Wi-Fi connection with no router or internet needed. Both devices need EmberShare installed. If either phone's Wi-Fi hotspot is switched on, turn it off first. A phone can't run a hotspot and Wi-Fi Direct at the same time. Finding the other device can take up to a minute, and stops the transfer at any point.

Share: opens Android's standard share sheet, so you can send the file to WhatsApp, email, Drive, or anything else installed on your device.
You can use the share button to pass a file to your preferred media player if you want to watch or listen to it yourself.
Sharing more than one file gives you a choice between (the files individually) and (bundled into one file). Useful for apps like WhatsApp that only accept one file per share.

Save to SD card: saves a copy to a removable SD card (only shown if an SD card is mounted). The first time you use this you'll be asked to grant access to a folder. The subfolder name can be changed in Settings. Your tags are saved with the files in a small file, embershare-manifest.json, so another EmberShare can pick them up from the card. When you browse the card to import, tick that file along with the files.
Web: adds the file to a set of files to be shared by the web server.
Single tap on Bluetooth, Wi-Fi Direct, Share, or Save to SD shares just that one file straight away.
Long-press any of them instead to start building a multi-file selection.
Selecting multiple files

Long-pressing a share icon (or the Web icon, or a file panel itself) enters selection mode: a bar appears at the bottom showing how many files are selected, with to add every file matching the current filters, and a close button to cancel the selection. Tap any file panel to add or remove it from the selection.
The action button on the selection bar matches whichever method you started with (, , etc).
Sharing EmberShare itself
(on the side drawer) puts a copy of EmberShare in your list. It will be named EmberShare-1.01.apk (the number is the app's version). A one-page PDF installation guide is also created. You can share these like any other file to a phone that can't access Google Play.
The other person opens the APK to install it. Android will prompt them to allow installing from that source. It may show other warnings, because the app isn't being downloaded from Google Play.
A step-by-step installation guide covering common problems is available from embershare.discoverapp.org/sideload.
The Share this app entry is greyed out if the current version of the app is already in your list. If an older version is available, you will be asked whether to it or .
Server
The Server tab starts and stops EmberShare's built-in web server, so nearby devices can download files from it in a web browser without needing EmberShare on their device. The web server can be run on the phone's hotspot if no Wi-Fi network is available.
Queuing files
Before starting the server you need a set of files to serve. Add them from the List screen via the Web icon (see above). The server remembers the last set you used. If you start the server with a different set of files, you'll be asked whether to them to that existing set or it.
You can add or remove files via the List screen while the server is running.
Starting the server
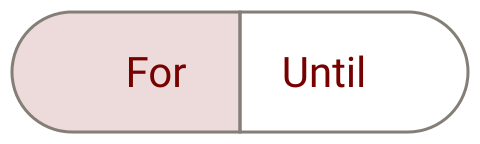
Set a duration or an time (up to a hard cap of 8 hours), then tap .
Wi-Fi: if your device is on Wi-Fi, the server starts on that network.

Hotspot: if your device isn't on Wi-Fi, you'll be offered the choice to start a local Wi-Fi hotspot for it, or (some networks or public Wi-Fi may block either option).
You can use your phone's own personal hotspot: turn it on first, then hit and choose . The server works on it just as well as on the temporary hotspot.
The temporary hotspot has a random name and password each time. Your device's hotspot keeps the name and password you chose, which may be friendlier to read out and easier for other people to find again.
Once the server is running, you can share the address shown with Copy or the QR code button. Anyone who scans it or types the address into a browser can browse and download the served files.
While it's running

The Server tab keeps a count of live connections, files-served, and files-transferred. Tapping the EmberShare notification brings you directly to this screen. switches the List screen to show just the served set.
Removing a file from the server
 While the server is running, a served file's Web icon on the List screen is marked with a strike-through line. Tapping the icon removes that file from the server; long-press instead lets you select several to remove at once.
The button on the Server tab (only available when the server is stopped) empties the whole queue.
Import
The Import tab allows you to bring new files into EmberShare's library. Every method below lands you on the review screen, where you can rename files, add or remove tags, and choose which of the imported files to actually keep before they're added to your library.

: pick one or more files from anywhere on your device using Android's own file picker.
: the same file picker, opened at your SD card (only shown when a card is inserted). Files EmberShare saved to the card bring their tags with them: tick the embershare-manifest.json file along with them. If they use a custom tag you don't have, EmberShare offers to add it. After you've saved to the card from this phone, the picker opens in your save folder.
From a computer over USB: no separate step is needed for this. Connect your device to a computer with a USB cable, copy files onto it (for example, into the Downloads folder), then use to pick them up from wherever you copied them to.

: fetch a file directly from a web address.

: scan another EmberShare device's web server QR code (or enter its address) to pull files from its running web server. If you have space for it, the files bring their tags. Both phones need to be on the same Wi-Fi network. The sending phone can be the hotspot (the web server can't run on a receiving phone's hotspot).
: the receiving side of the List screen's Wi-Fi Direct share; wait here while the other device sends. stops waiting or receiving. If either device cancels the file transfer attempt will end.
Share to EmberShare from another app: sharing a file to EmberShare from WhatsApp, Gmail, a browser, etc. lands here automatically too.

: receives files from a Google Drive backup. This can be your personal backup (see Cloud Backup below, for how to connect your Google account) or a shared backup from someone else. Paste or scan their link to read it, no Google account is needed. In either case, you pick which tags you want to import before downloading. A file that's identical to one already on your device is skipped automatically.
EmberShare tries to tag each file from its filename and metadata (language, country, media type, extension). You can review and adjust these tags on the staging screen before importing. If a file you're importing already has the same name as one already in your library, you'll be asked to rename it or skip it. Archives (.zip) are automatically extracted into their individual files unless you turn that off in Settings.
Cloud Backup
Back up your files and their tags to your own Google Drive account, and restore them again later, on this device or after switching to a new one.
Setting up backup (Settings)
: signs you into your own Google account. EmberShare only ever asks for access to the one folder it creates for this, never your wider Drive.
Backup frequency: Never, Weekly, Monthly, or On new file import.
: runs a backup immediately, regardless of the frequency setting.
If a cloud file already exists on this device: Ignore (default) or Overwrite. This governs restoring, not backing up: when a file you're pulling down already has a same-named file on your device, Ignore leaves the existing one alone, Overwrite replaces it (if the content's actually different; an identical file is always left).
: hands you a link (and QR code) that lets someone else browse and restore from your backup, read-only. Anyone with the link can use it.
Restoring
See under Import above.
Manage Tags
Files can be organised and filtered by tags. EmberShare starts with Country, Language, Media, Extension and Type. It also allows you to add custom categories. From this screen you can:
Create up to three custom tag categories, or delete any you no longer need.
Reorder categories: this order is used everywhere they're shown (the filter row, file panels, the tagging sheets).
Show or hide a category in the filter row without deleting it.
Edit the list of values available within a category (e.g. add a new Type). Deleting a value that files already use asks whether to remove it from those files too or keep it on them.
Settings
Use system theme / Dark mode: follow the device's theme, or force light/dark.
Use short codes in tags: shows compact codes (e.g. language/country codes) instead of full names on tag pills.
Show full-screen tag lists: choose whether a filter with many values opens as a dropdown or a full-screen picker, either always, never, or once a category passes a value count you set.
Automatically unzip archives: controls whether importing a .zip extracts its contents automatically.
Include file share message: adds a short message alongside a file shared via the Share icon's system share sheet (not Bluetooth or Wi-Fi Direct, which hand off directly to one device rather than a general share target). The message text itself is also editable here.
SD card folder name: the subfolder created inside whichever folder you granted access to when saving files to an SD card.
Website settings: the heading, greeting, and footer text shown on the served web page, plus its background, text, and link colors.
Backup settings: connecting Google Drive, backup frequency, and restore behaviour (see Cloud Backup above).

The Discover Network is a Registered Charity in England and Wales (Charity No 1193870)
©2026 The Discover Network